
With WPILib VS Code installed, you're ready to create your first robot project. This lesson walks through starting a new Command-based C++ project, generating it, switching the deploy target to the VMX-pi, and installing the navX and Titan vendor libraries. Follow each step in order and watch the terminal for the Build Successful message that confirms things worked.
When you open WPILib VS Code for the first time, it should look similar to Figure 1.1.
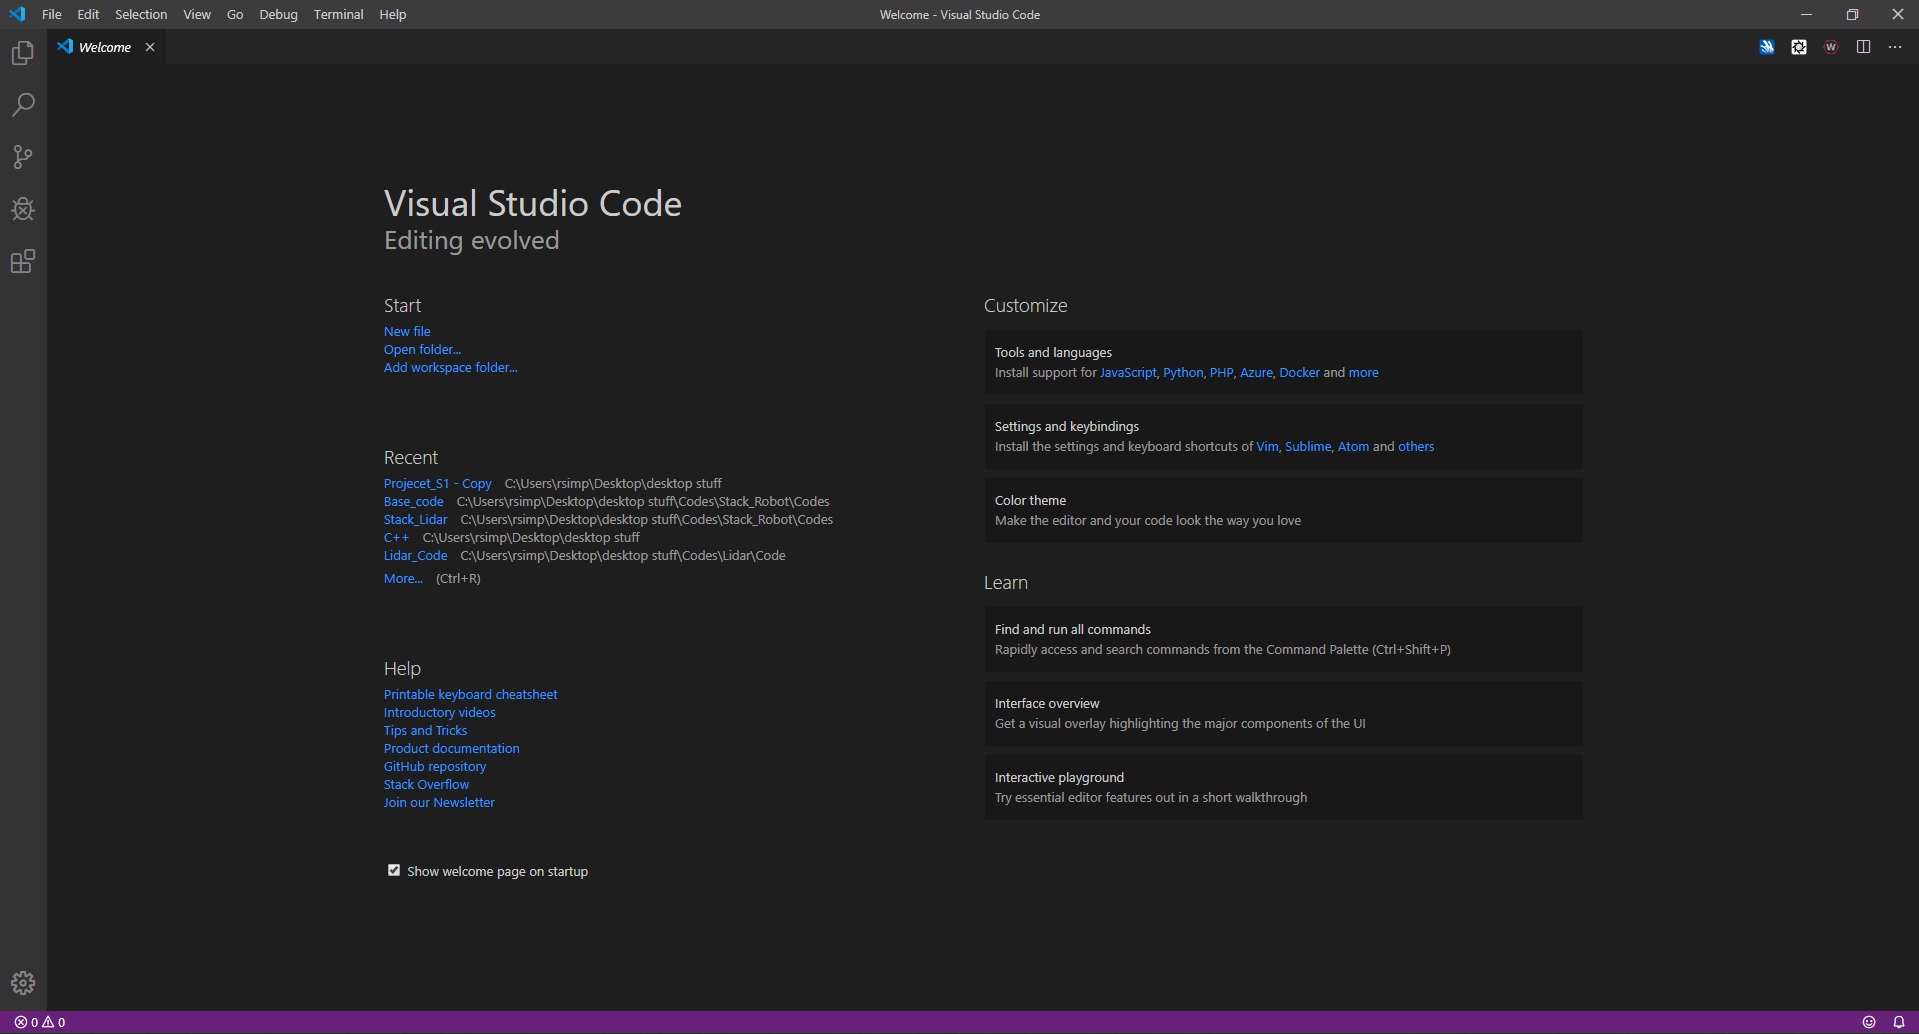
Creating a New Project
To start a project, click the WPILib icon in the top-right corner (Figure 1.2).
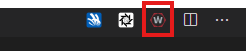
A pop-up window will appear. Type Create a new project and press Enter. If done correctly, you should see a screen similar to Figure 1.3.
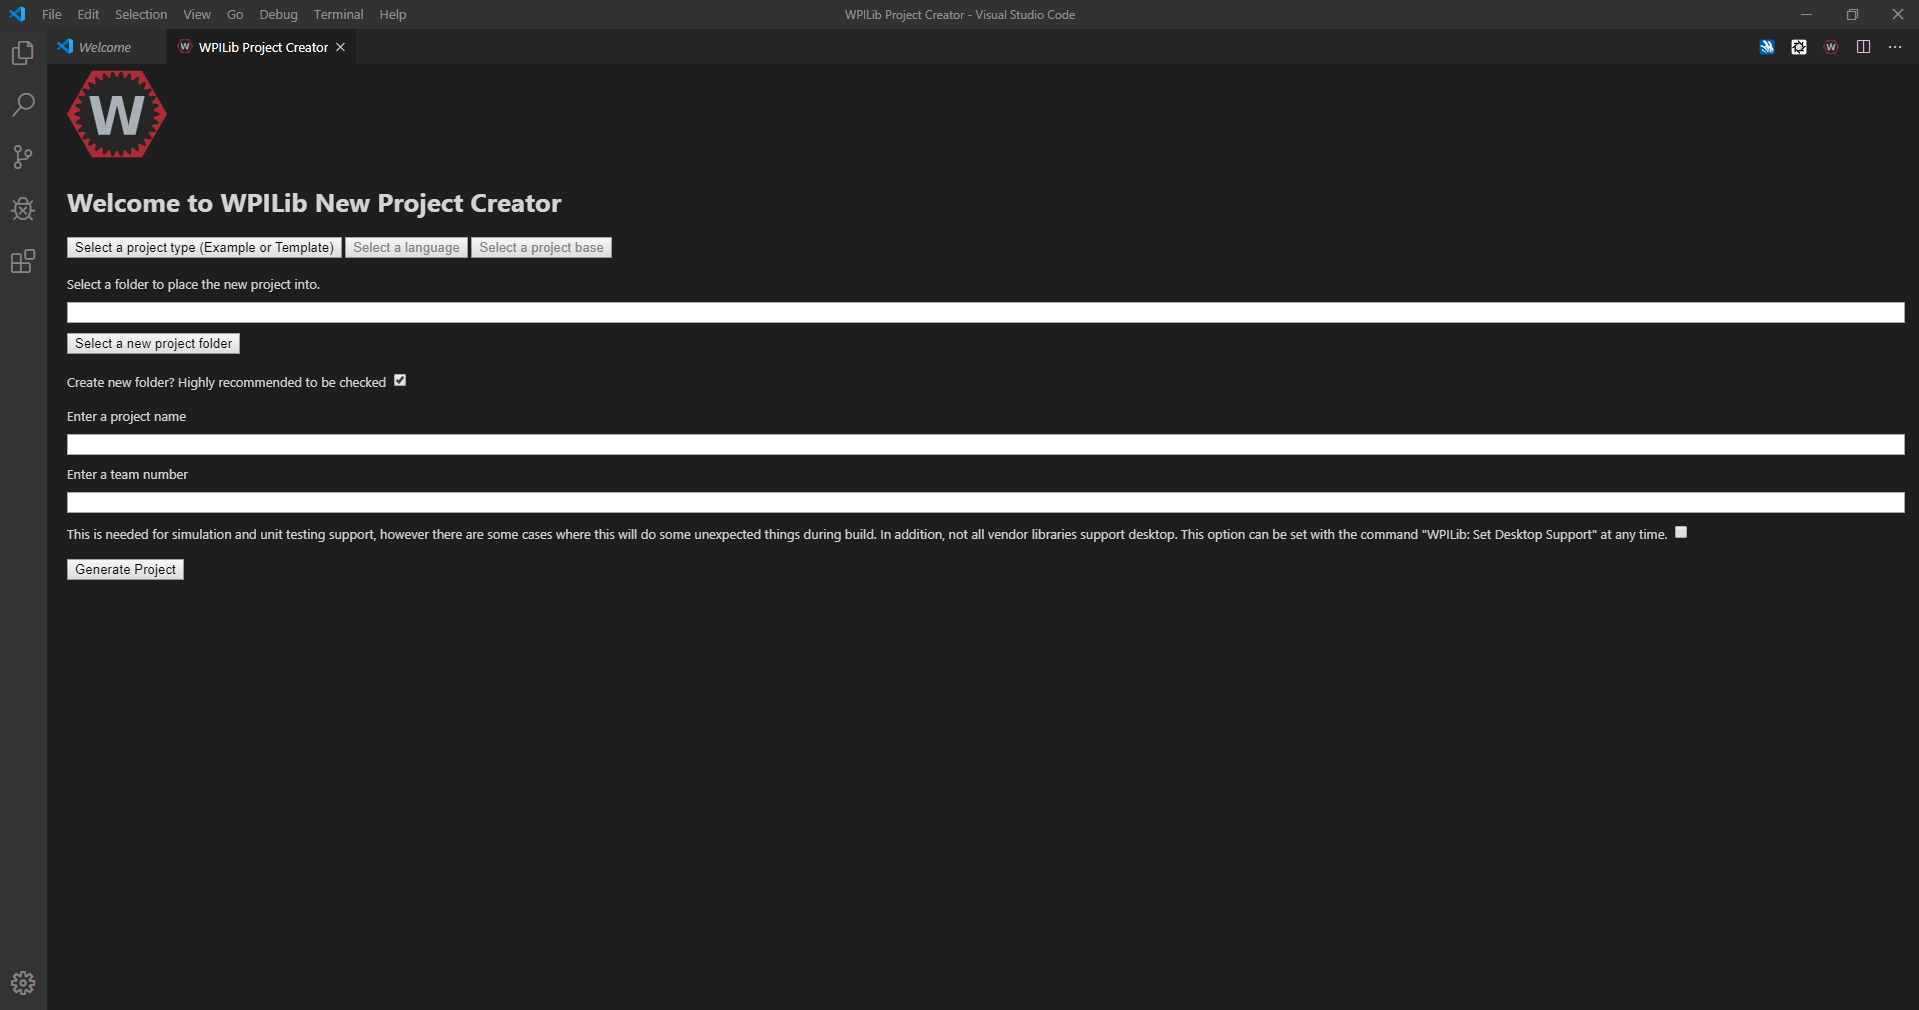
Select a project type from the two options — Template or Example — then choose a language, either C++ or Java. In our case we select C++. After that, choose a project base from the five options below.
Choosing a Project Base
1. Timed Robot Most common
The standard and easiest project base. Runs code in a loop every 20 ms automatically. You override methods like robotInit(), teleopPeriodic(), and autonomousPeriodic().
2. Timed Skeleton Advanced
Basically TimedRobot, but stripped down: minimal structure, no example code, you build everything yourself.
3. RobotBase Skeleton Advanced
Gives you very low-level control. Doesn't use TimedRobot at all — you manually control the robot loop and decide timing and execution.
4. Command Robot Recommended
The modern structured system used in competitions. Uses Subsystems (drive, arm, intake) and Commands (actions like drive, shoot), built on top of TimedRobot.
5. Old Command Robot Deprecated
The deprecated version of Command-based programming: outdated, not maintained, and structured differently from modern WPILib.
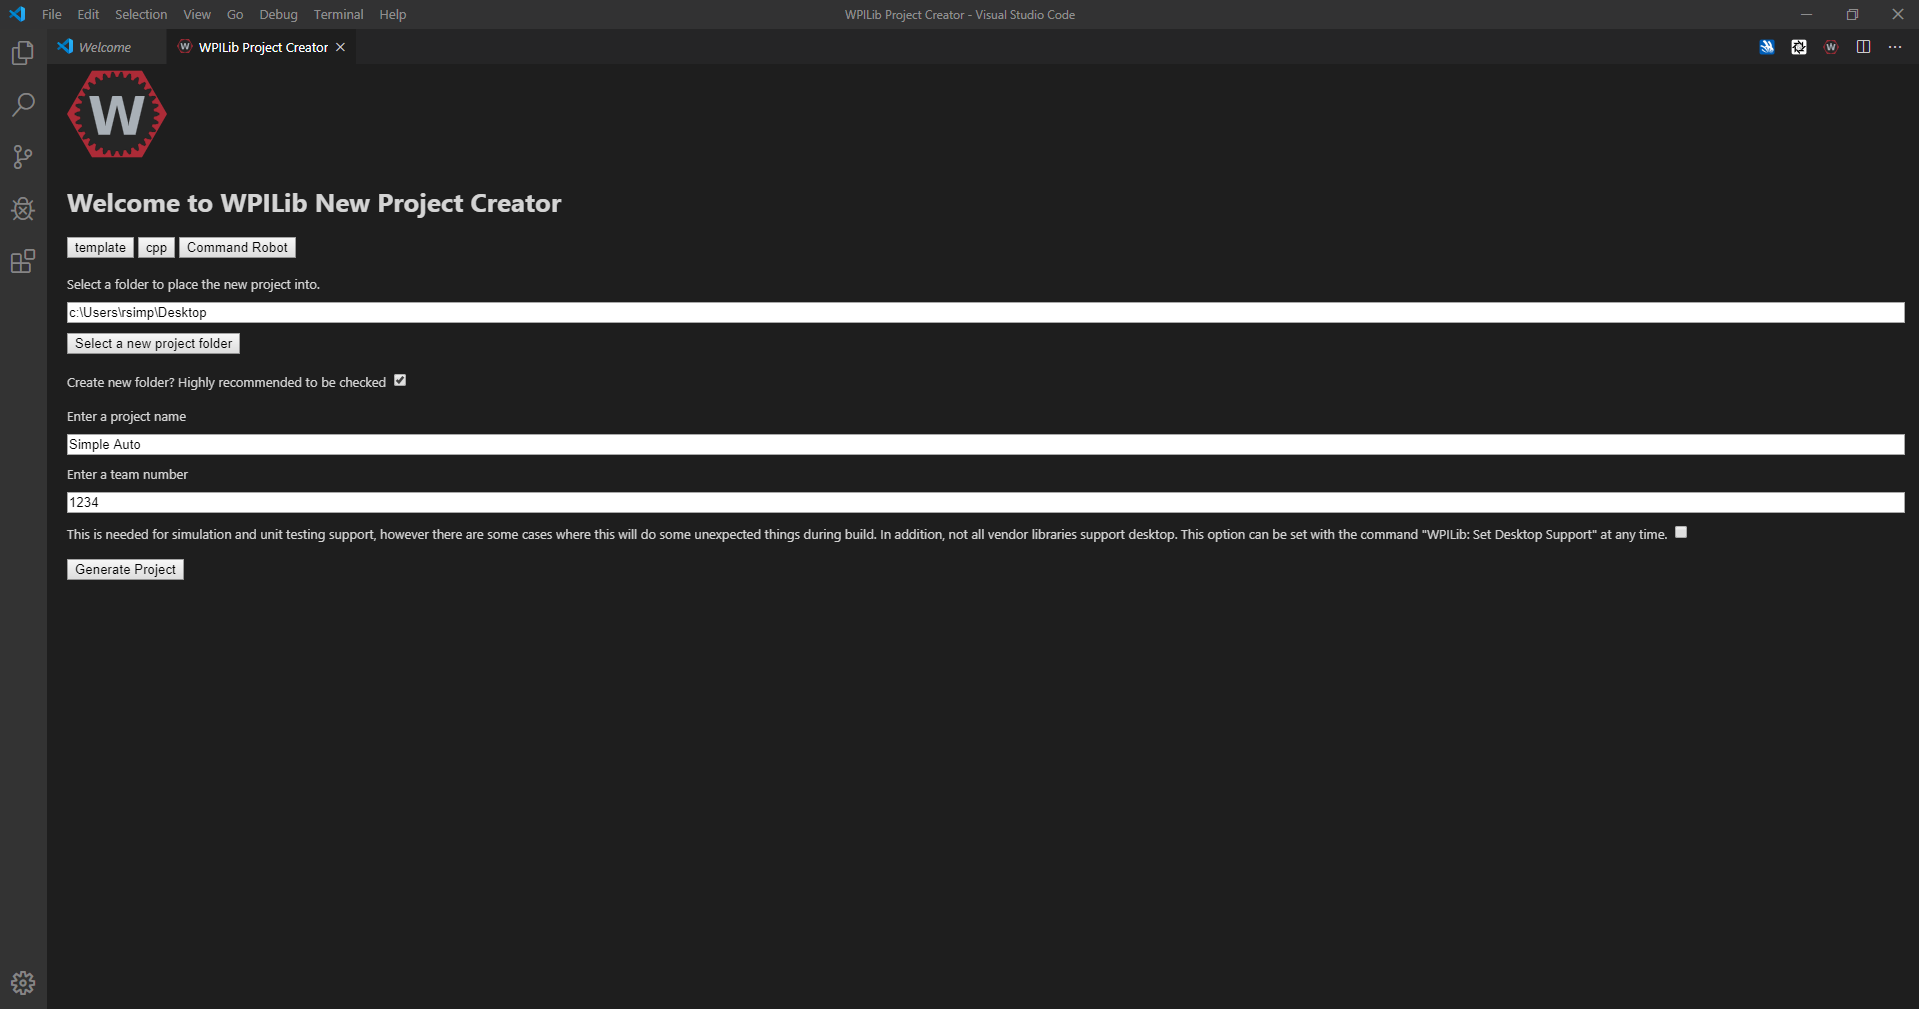
Note that the team number changes during competition, because the official competition team number will be provided there. For training, we use team number 1234. If everything is entered correctly, your screen should look similar to Figure 1.4.
Generating and Deploying
While connected to the internet, click the Generate Project button and give it a minute to load fully. Once loading is complete, the terminal should display Build Successful, as shown in Figure 1.5.

At the top left, click the VMX button (Figure 1.6) and change the deploy target to VMX-Pi (from RoboRIO). Make sure you are connected to the internet during this process.

20.3.2.30. If it shows any other version, change it to 20.3.2.30, then change the deploy target again (stay connected to the internet). Once the terminal shows BUILD SUCCESSFUL, you know everything was done correctly (Figure 1.7).
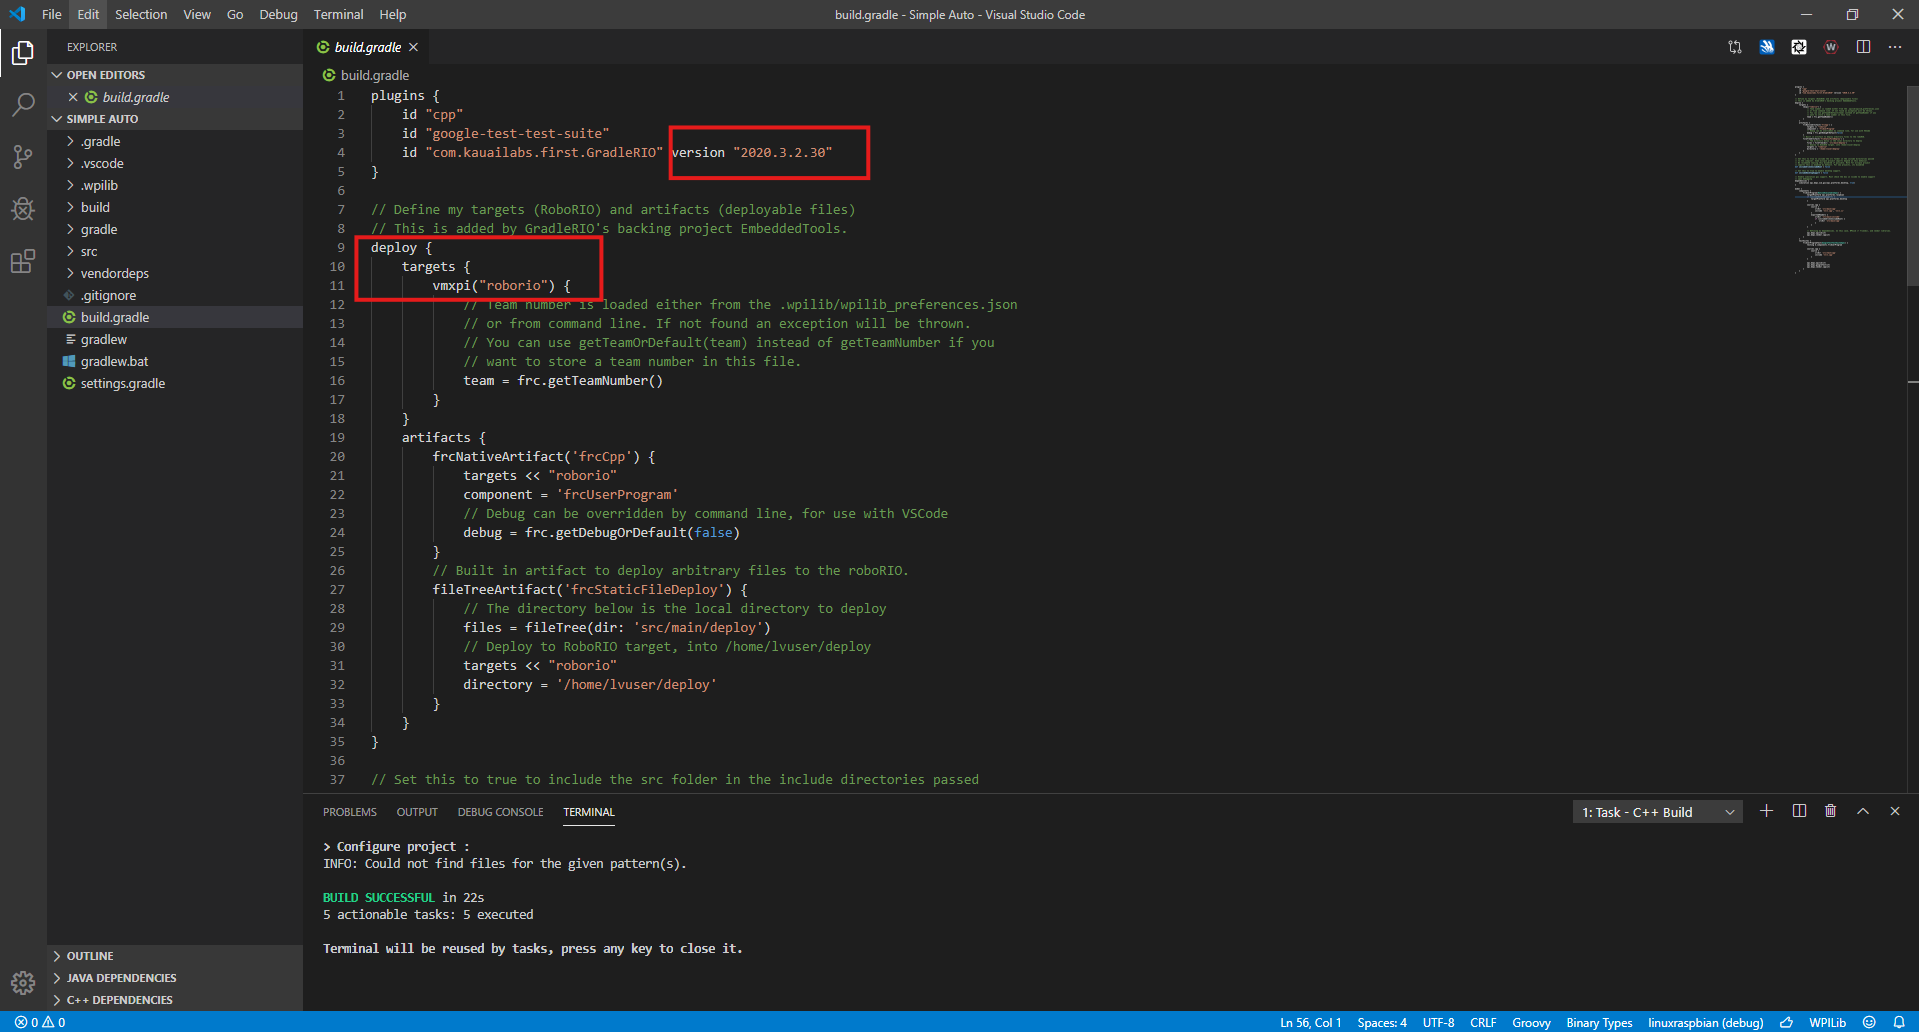
Installing Vendor Libraries
Click the WPILib button again and select Manage Vendor Libraries, then Install new libraries (online) and paste the links below. Make sure you are connected to Wi-Fi. After installing the first library the terminal will show Build Successful; repeat the same process for the second.
- Kauailabs' navX library
https://www.kauailabs.com/dist/frc/2020/navx_frc.json - Studica's Titan library
http://dev.studica.com/releases/2020/Studica.json
Installing the C++ Toolchain
Because we're working with C++, we need to install the Raspbian toolchain. Click the WPILib button again, search for Run a command in Gradle, press Enter, and type the command below.
installRaspbianToolchain